Thursday, 6 August 2015

Seaside nails

Hi,
My luggage is ready and so are my holiday nails, so now I'd like to show you my new seaside nail art. The base for this manicure is a blue gradient that I created using Rimmel - Out of the blue and Rimmel - Too cool to tango over a white base coat. After sealing it with clear top coat, I took my water marble glass, poured a drop of Avon - Prompt and Pearly and then sprayed it and inserted my finger in the water. This way, I created the sea foam effect. On my index and middle fingers, I created a hole using a thin brush and acetone and then applied a shell sticker from Born Pretty store. I also added a white pearl from the same store. I finished with clear top coat. What do you think? 

By the way, don't forget to use my 10% discount code MKAK31 with any order on Born Pretty store.

Follow me on:

Tuesday, 4 August 2015

Pink lemonade

Hi
Today I'll show you an easy stamping nail art. I started with two coats of Avon - Iceberg White on all nails and then stamped the lemons design from Bundle Monster's BM-308 with Sinful Colors - Cream Pink. I didn't transfer the design on the nail right away, but took a thin brush and Rimmel - Daisy Days and filled in the lemons. After it had dried, I applied clear top coat over the image on the stamper so as I can remove it easily and this way I created a home made decal. I applied the decals on the nails and finished with clear top coat. 
What do you think?

Follow me on:

Friday, 31 July 2015

Mermaid nail art

Hi,
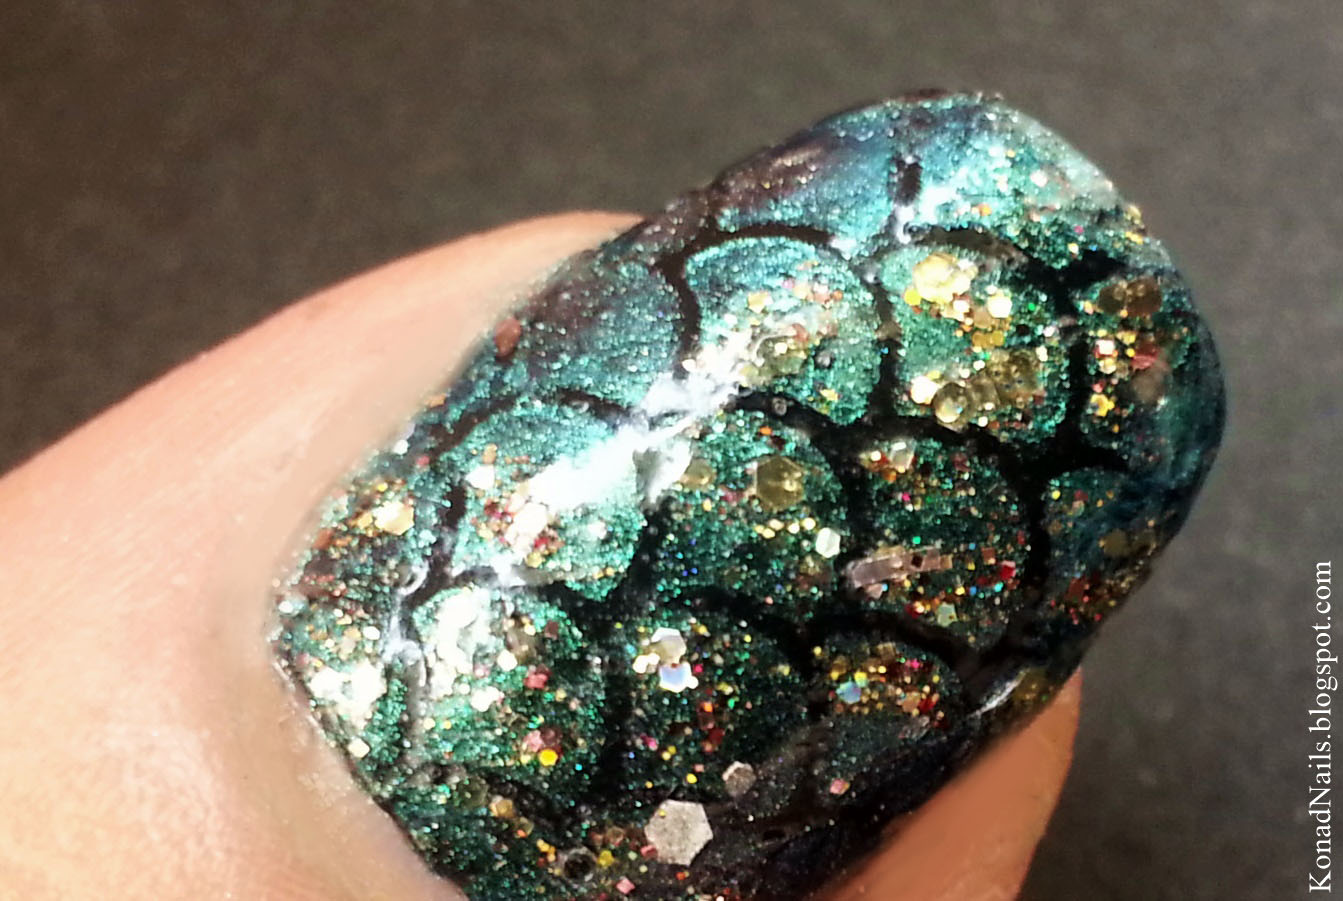
Today I'll show you my fish scale manicure which I easily created using the mermaid stencils from What's up nail art store. I started with a coat of Glitter Gal - Serpent black and then applied a coat of clear nail polish and let it dry. After placing the sencils, I applied Gosh - 540 Ocean and Shimmer Polish - Tracy using a sponge. Then, I removed the stencils and applied clear top coat. On my index and ring fingers, I applied some pearls and shell studs from Born Pretty store. I only fixed them on the nail using clear top coat. What do you think?

By the way, don't forget to use my 10% discount code MKAK31 with any order on Born Pretty store.

Also, click here if you'd like to see my mermaid nails from last year.


Follow me on:


Wednesday, 29 July 2015

Happy nails

Hi,
Today I'll show you another old manicure that I never got to post. For this one, I started with a coat of white nail polish on each nail and then created the colourful gradient. I applied pink, yellow and green polish on a sponge and then transferred them on the nails. After that, I stamped the happy faces design from Bundle Monster's BM-304 image plate and finished with clear top coat. What do you think?

Follow me on:

Monday, 27 July 2015

Moroccan nail art

Hi,
Today I'll show you my Moroccan manicure which I easily created using What's Up Nails stencils. I started with two coats of Rimmel - Tangerine Tent on all nails and then applied clear top coat. After letting it dry, I stuck a stencil on each nail and then applied No7 - Totally Teal and Golden Rose - Holiday #58 using a sponge, so as to create a beautiful gradient. After that, I unstuck the stencils and applied clear top coat. You can find the Moroccan stencils here on their website. On my ring finger, I applied a green rhinestone and then applied some small golden studs around it. What do you think?

Follow me on:

Sunday, 26 July 2015

Turquoise animal print nails

Hi,
Today I'll show you an old manicure I never got the chance to post. This is a really easy to do mix and match. The dark blue polish is Rimmel - Adam n Eve it and the turquoise one is China Glaze - Too Yacht to Handle. On my middle finger, I applied the two nail polishes over a white base, using a sponge. The animal print on my ring finger was created freehand, using a thin brush. At the end, I applied clear top coat to seal in everything.

I'd also like to show you a manicure I did on a friend's nails a while ago. All was painted freehand. The nude nail polish is Rimmel - Let's get nude. What do you think?

Follow me on:

Friday, 24 July 2015

Kiwi nails

Hi,
Today I'll show you another easy to do freehand nail art. I started with two coats of Golden Rose #18 as a base colour for my manicure and then created a white dot in the middle of each nail. After that, using a thin brush I created some white radial lines and then added the small black dots to represent the seeds. Finally, I sealed in everything using clear top coat. 

I'd also like to show you a manicure created on a friend's nails. I stamped the palm tree design from MoYou London's 12 plate. What do you think?

Follow me on:


Free counters!