Thursday 31 July 2014

Green & Red apple inspired nails

Hi,
Today I'll show you my new manicure inspired by apples' color. I'm talking about that moment when they are both green and red and they look really beautiful, so I decided to try this combination on my nails.

Buna,
Astazi o sa va arat manichiura mea inspirata de culoarea merelor. Ma refer la acel moment cand ele sunt atat verzi, cat si rosii si arata incredibil de frumos, asa ca am decis sa incerc aceasta combinatie si pe unghii.

If you remember, a while ago I showed you the nail polishes received from Farmec on my facebook page. I already showed you the pink nail polish here and now I'll present you the other two.

Daca va mai amintiti, acum catva timp v-am aratat ojele primite de la Farmec pe pagina de facebook. V-am aratat deja oja roz aici, iar acum vi le voi prezenta pe celelalte doua.

Daca nu stiati, ojele Farmec se pot gasi acum si online, aici. Pe site gasiti de la produse pentru unghii, par, machiaj, pana la produse de curatenie si insecticide. Nu uitati sa dati like paginii de facebook Farmec pentru a fi la curent cu toate noutatile.


The two polishes used for my manicure are Farmec -Baked apple (green) and Farmec -Feeling special (red). I created the chevrons using nail vinyls from Stickmenails. The 3D bow decoration is from Born Pretty store. 

Cele doua oje folosite pentru aceasta manichiura sunt Farmec -Baked apple (verde) and Farmec -Feeling special (rosu). Am creat modelul chevron folosind vinilurile de Stickmenails. Funda 3D este de pe Born Pretty store. 


Follow me on:

Wednesday 30 July 2014

Green neon nails

Hi,
Today I'll show you my new green neon nails. I created these for a competition I took part in on Instagram (see more details here). I used white nail polish and two shades of green: Claire's -Beach neon nail polish and Sinful Colors -Happy ending. On the middle fingers, I stamped the design from Cheeky Beauty's stamping plate GA26, whereas on the pointer and pinkie I applied Cherimoya's +/- Magnetic #19 black and white glitter.


After everything has dried, I applied my new fluorescent top coat from Born Pretty store. Unfortunately, it was very hard for me to capture how it really looks like in reality, but that's the closer I could get. The effect is visible in the dark, but only after exposing your nails in an UV lamp or under night club neons. 

So, what do you think?

Follow me on:

Saturday 26 July 2014

Sunset gradient with a fan brush

Hi,
Toady I'll show you my new sunset nail art. If until now I showed you plenty of gradients created with a sponge, now it's time to show you one created with a fan brush. Hope you'll enjoy it!

Buna, 
Astazi o sa va arat un apus frumos de soare, pe unghii. Daca pana acum v-am aratat multe manichiuri gradient realizate cu buretele, acum o sa va arat una realizata cu o pensula evantai. Sper sa va placa!

I started with a coat of white nail polish, and then I applied the pink (Farmec #364) and yellow (Avon -Inspire) polishes using a fan brush. I got mine from Born Pretty store, in a set of  15 brushes for only $6.

Am inceput prin a aplica un strat de oja alba, iar apoi am aplicat oja roz (Farmec Lac De Unghii Ultrarezistent 364) si pe cea galbena (Avon -Inspire) folosing pensula evantai. Am cumparat-o de pe Born Pretty, intr-un set de 15 pensule, pentru doar 6 dolari.

Daca nu stiati, ojele Farmec se pot gasi acum si online, aici. Pe site gasiti de la produse pentru unghii, par, machiaj, pana la produse de curatenie si insecticide. Nu uitati sa dati like paginii de facebook Farmec pentru a fi la curent cu toate noutatile.

Then I stamped the black designs from MoYou London Explorer 10 stamping plate. I finished with clear top coat. What do you think?

Apoi am stampilat modelele negre de pe placuta MoYou London Explorer 10. In final, am aplicat top coat transparent. Ce parere aveti?

Follow me on:

Wednesday 23 July 2014

Guepard nail art

Hi,
Today I'll show you my new cheetah print manicure. I did it using one of my new MoYou Nails UK stamping plates and I really like how it turned out. Hope you'll enjoy them as much as I do!

Buna, 
Astazi o sa va arat noua mea manichiura cu print de ghepard. Am realizat-o cu ajutorul unei placute MoYou Nails UK si sunt foarte incantata de ce a iesit. Sper sa va placa la fel de mult ca mie!

The base colour I used is Maybelline MNY 461. It's a very beautiful gold polish, which dries extremely fast.

Culoarea de baza pe care am folosit-o este Maybelline MNY 461 si am achizitionat-o de pe ProduseCosmetice.ro. Este o oja aurie superba, care se usca extrem de repede. 
Va invit sa vizitati site-ul lor pentru ca au o multime de produse minunate pentru unghii, dar si pentru machiaj, par si corp.

With my MoYou order I received the following items:
In comanda mea pe MoYou am primit:
- Image plate 70 / placuta 70
- Image plate 98 / placuta 98
- Image plate 222 / placuta 222
- summer 2014 catalogue / catalog de vara 2014

I did the first manicure using image plate 98. After applying the gold base, I applied a beige polish from place to place, using a sponge. Then I stamped the design using special black polish. I got it from Born Pretty store. The polish was in a set (white stamping polish + black stamping polish) which you can find here for $3,41.

Prima manichiura am realizat-o cu placuta 98. Dupa aplicarea bazei aurii, am aplicat o oja crem pe alocuri, folosind un burete. Apoi am stampilat modelul folosind oja speciala neagra. Am luat-o de pe Born Pretty store. Oja era intr-un set (oja alba + oja neagra pentru stampilat) si il puteti gasi aici, la pretul de $3,41.

Follow me on:

Tuesday 22 July 2014

5 sfaturi pentru un bronz sanatos

Ce e mai frumos decat un bronz ciocolatiu pe timpul verii, pus in evidenta de o 
rochie vaporoasa alba? 
Toate vrem un bornz frumos, dar unele dintre noi ar face orice sa il obtina. Pana in urma cu cativa ani eram si eu la fel. Stateam pe plaja de dimineata pana seara, fara sa ma gandesc la efectele negative, ci doar la tenul aramiu pe care mi-l doream atat de mult. Bine inteles ca urmarile nu au intarziat sa apara: arsuri, pete maronii, pete albe. Asa ca am luat atitudine, iar astazi voi impartasi cu voi 5 sfaturi pentru un bronz frumos si sanatos. 


1. Evita expunerea la soare la orele amiezii
Sfatul medicilor este sa evitam expunerea la soare intre orele 11 si 16, intrucat razele soarelui sunt mai intense in acest interval orar. Daca totusi expunerea nu poate fi evitata, poarta o palarie si ochelari de soare, stai in locuri umbrite si cel mai important, nu uita sa te hidratezi (consuma intre 1,5 si 2 l de lichide, mananca iaurt, fructe si legume). 


2. Foloseste protectie solara
Probabil ati mai auzit asta de multe ori, dar este un aspect care nu trebuie neglijat. Pelicula invizibila ce ramane pe piele dupa uscarea cremei sau a sprayului cu protectie solara e esentiala pentru sanatatea pielii noastre. Este foarte important sa alegi corect factorul de protectie ce ti se potriveste. Culoarea parului si a ochilor spune multe despre tenul tau, asa ca ghideaza-te dupa tabelul de mai jos:

Blonda cu ochi albastri – cea mai mare protectie - SPF 60
 Blonda cu ochi caprui - SPF 60 in primele zile, iar ulterior se poate scadea protectia la SPF 20 
Satena cu ochi capui –  SPF 60 in primele zile,  iar ulterior se poate scadea protectia la SPF 15
 Bruneta cu ochi caprui-inchis – protectia necesara e SPF 6
Mulatra – nu necesita protectie, ci doar hidratare 

3. Vitaminizeaza-te
Atat vitamina A, cat si vitamina D sunt foarte importante pentru pielea ta. Unde le poti gasi? Morcovii, brocolii si legumele verzi sunt bogate in vitamina A. Incepe dimineata unei zile de plaja cu un pahar de suc natural de morcovi. Morcovul ajuta la pastrarea bronzului pe trup, are efect antioxidant si previne aparitia ridurilor. 

Vitamina D este secretul intineririi pielii. Aceasta este sintetizata in piele prin expunerea la razele UV sau poate ajunge ajunge in organism printr-o dieta bogata in lapte, oua, cereale, ciuperci sau peste.

4. Nu lasa norii sa te pacaleasca
Un cer noros nu te scuteste de protectia solara. Norii permit mult mai multor raze UV să treacă prin ei decât permit celor infraroşii şi luminii vizibile. Astfel, dacă vremea se întunecă şi temperatura scade, nu înseamnă neapărat că riscurile razelor UV scad. În zonele de munte, pericolul există chiar şi la temperaturi foarte scăzute. Filtrul creat de atmosferă este redus din cauza altitudinii, aşa că soarele este mai agresiv (cantitatea de raze UVB absorbite de piele creşte cu 4% la fiecare 300 m). 

5. Nu uita de protectia buzelor si a parului
Acestea sunt doua zone frecvent neglijate. La soare si la vant buzele au nevoie de o ingrijire deosebita pentru a nu se usca si a crapa. Foloseste balsamul pentru protectia buzelor L’Erbolario, cu protectie foarte inalta (SPF 50+). Tot in aceasta gama gasesti si ulei protector pentru par. Usor si fin ca un val, acest ulei pentru protectie solara, bogat in substante hranitoare si emoliente, reprezinta un scut impotriva actiunii ondulatoare, epuizante si de uscare din cauza vantului, soarelui si a sarii din apa. Are protectie joasa (SPF 10) si nu incarca sau unge parul.

Urmeaza aceste sfaturi simple si nu vei avea de ce sa te ingrijorezi. Vacanta ta va fi una linistita si lipsita de durerile provocate de arsurile solare.

Anul acesta, L’Erbolario a lansat o noua gama de produse cu protectie solara, pe care imi doresc si eu sa o incerc. L’Erbolario sunt produse cosmetice naturale, nascute din dragoste pentru natura si au la baza studierea indeaproape a principiilor active ale plantelor asupra ingrijirii si tratarii pielii. Va invit sa o descoperiti in farmaciile Sensiblu.
Nu uitati: Protectia solara este indispensabila pentru toate zonele corpului, infiferent ce gama de produse veti alege!

Follow me on:

Friday 18 July 2014

Feather nail art

Hi,
Today I'll show you a manicure that is very easy to do. Without any other introduction, let me tell you how I did it. I firstly created a black and white gradient using Flormar -M01 (white) and Flormar -399 (black). Then, I applied a coat of Golden Rose -Impression #12 on each nail. 
On my thumb and ring finger, I only applied two coats of white nail polish and then stuck some feather water decals. You can find them on Born Pretty store. I finished with clear top coat. 
What do you think?

Don't forget to use ASJ61 code for a 10% discount at Born Pretty store. 


Follow me on:

Tuesday 15 July 2014

Mermaid nail art

Hi,
Today I'll show you my new mermaid nail art. This one was inspired by the base colour I was wearing, Sirene  from I Love Nail Polish. If you firstly thought that I had a gradient on my nails, you were wrong. This colour is the definition of perfection: it's both holographic and duo-chrome!

Find below some swatches of ILNP -Sirene and be prepared to fall in love with it. 

After applying the base colour, I stamped the scales from Cheeky Beauty's GA14 stamping plate. On my accent nail, I applied some gold shell charms and pearls which I got from Born Pretty store. I finished with clear top coat. What do you think?

Shell studs - HERE
Pearls - HERE 

Don't forget to use ASJ61 code for a 10% discount at Born Pretty store.


Follow me on:

Sunday 13 July 2014

Homemade decals | Floral anchor nail art

Hi,
Today I'll show you my new floral anchor nail art. 
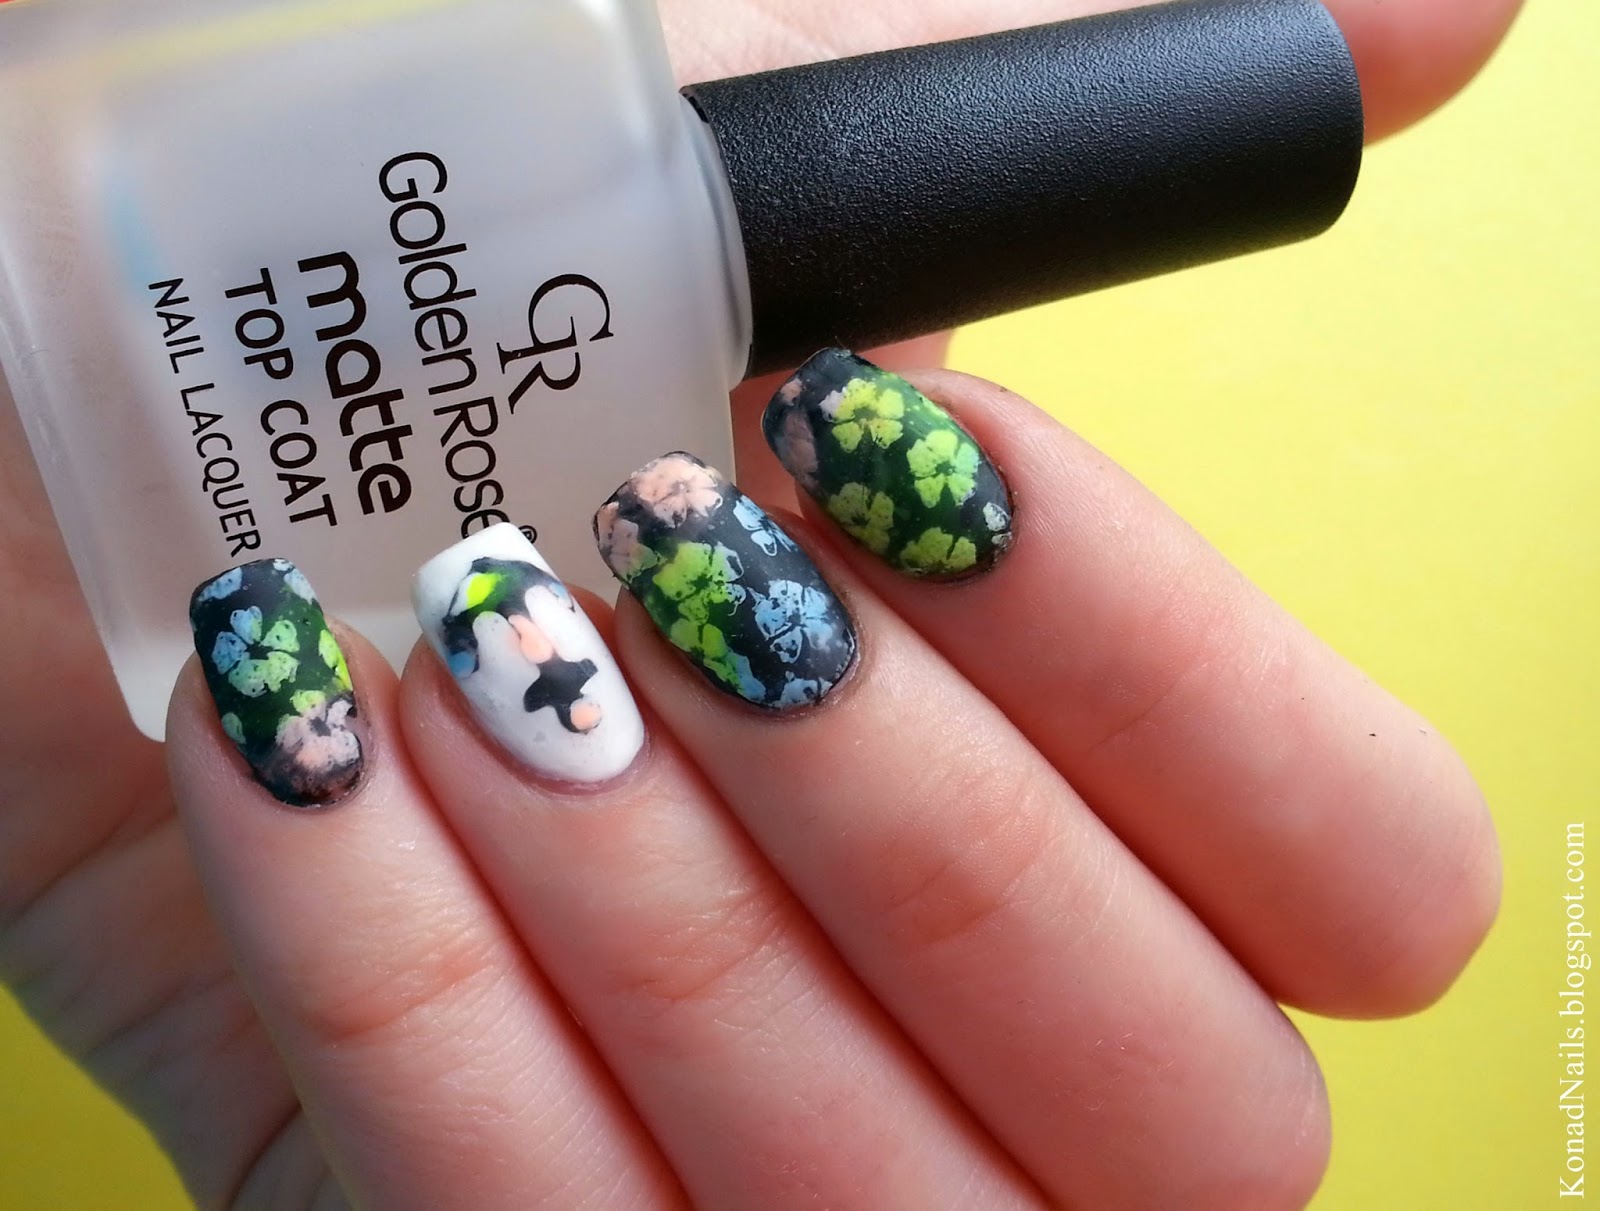
I started with two coats of Glitter Gal -Serpent Black on all nail except from my ring finger, where I applies ProNails -Extreme White. Then I appplied some homemade water decals and finished with Golden Rose -Matte top coat. Find below my easy tutorials on creating homemade decals.

Anchor decal (you can also watch the pictorial I posted on Instagram here)
→ Take a plastic wrap or plastic bag and put it on a hard surface. 
→Stick the anchor stencil (or any stencil) on it. My anchor stencils are from Nails Redesigned.
→Apply a coat of black nail polish so as to cover the hole. 
→Remove the stencil while the nail polish is still wet and then let it dry. 
→Apply clear top coat and let it dry. This will help you unstick the decal from the plastic wrap. 
**The next step is optional. 
If you don't want to create any more designs on your decal you're done. 
→Take your white nail polish and a thin nail art brush and create the wanted design. 
Colour it using sheer tints. 
→Unstick the decal using tweezers and apply it onto the nail. Seal with clear top coat.

I used the same technique for creating the full nail flowery decals. I stamped the design from MoYou London's Tourist 17 stamping plate.

Follow me on:

Monday 7 July 2014

Saran wrap nails

Hi,
Today I'll show you a manicure I created for a maniswap on Instagram with @whispersofthewind. I recreated her chevron manicure on a saran wrap base.
Watch this tutorial for details on how to do a saran wrap nail art. I know there are a lot of techniques you can use for this type of manicure, but I find this one the easiest. I used only three polishes to do it: China Glaze -Sun of a Peach, China Glaze -Too Yacht To Handle and Rimmel -312 Ultra Violet. I finished with clear top coat.

After my base completely dried, I applied extra wide chevrons and topped with white nail polish (the white nail polish I'm currently using is ProNails - Extreme White). After removing the vinyls, I again applied clear top coat. 

I got my chevrons online, from Nails Redesigned. Below you can see my entire order. I really like all the vinyls because they are not too sticky, which makes them easy to handle and remove. Their prices are accessible and international shipping is available. I received my order really fast - about 10 days - considering I am on the other side of the world. 

Follow me on:

Tuesday 1 July 2014

Trind Keratin Treatment + navy nail art

Hi,
Today's post will include a short review of the Trind's Keratin Treatment for weak nails, as well as my most recent navy manicure which you might have already seen on Instagram

Buna, 
Postarea de astazi va include un scurt review despre tratamentul cu keratina de la Trind pentru unghiile slabite, dar si cea mai recenta manichiura marinareasca, pe care s-ar putea sa o fi vazut deja pe pagina mea de Instagram


The kit I have contains two products meant to strengthen and repair the structure of deteriorated nails: a protecting balm which is absorbed fast by the nails and a protecting nail lacquer which can be applied after the balm.This treatment couldn't come to me in a most appropriate moment! My nails have started to weaken and I saw the results after the first use. The directions of use recommends applying the protecting balm more times a day. I have to admit that I couldn't prevent myself from painting my nails for too long. I held up for a day and I applied it about 10 times. In the pictures below, you can see how my nail looked before and after applying a coat of protecting balm, two coats of protecting balm, respectively a coat of protecting lacquer.

Kitul pe care l-am achizitionat contine doua produse menite sa intareasca si sa repare structura unghiei deteriorate: un balsam protector, cu o structura ce se absoarbe rapid, si un lac protector ce se aplica dupa. Acest tratament nu ar fi putut ajunge in mainile mele intr-un moment mai potrivit. Unghiile mele au inceput sa slabeasca si am simtit diferenta inca de la prima utilizare. Pe prospect se recomanda aplicarea balsamului protector chiar si de multe ori pe zi. Trebuie sa recunosc ca eu nu m-am putut abtine foarte mult timp sa nu-mi pictez unghiile. Am rezistat o zi, de-a lungul careia am aplicat balsamul aproximativ de 10 ori. In fotografiile de mai jos puteti vedea cum arata unghia inainte, dupa un strat de balsam, apoi dupa doua straturi de balsam si in final dupa un strat de lac protector, ce poate fi folosit ca o baza pentru oja. Rezultatele sunt evident vizibile dupa primul strat de balsam. 
Kitul de ratament cu keratina il puteti gasi aici, la un pret special.

Because I liked this treatment a lot, I also ordered a coloured nail polish from Trind. I chose Burst My Bubble (CC202) from their summer collection.

Pentru ca mi-a placut mult acest tratament, am comandat si o oja colorata. Am ales nuanta Burst My Bubble (CC202) din colectia de vara.
Am achizitionat produsele Trind de pe Rouge-Boutique.ro.


For the manicure above, I used straight vinyls on two of my nails, and an anchor decal on my ring finger. I got them both from Stickmenails, an online store selling plenty of beautiful stickers for nail art. If you're not sure how to use the vinyls, here's a tutorial showing you the technique. See below all that I got from their website. By the way, my order arrived extremely fast from the other side of the Earth - about 11 days.

Pentru manichiura de mai sus, am folosit stickere drepte si in forma de ancora. Le-am achizitionat de pe Stickmenails, un magazin online ce vinde foarte multe stickere frumoase pentru nail art. Daca nu sunteti sigure cum sa le folositi, urmariti acest tutorial. Mai jos puteti vedea intreaga mea comanda de pe site-ul lor, care trebuie sa va spun ca a ajuns extrem de repede din cealalta parte a globului - aproximativ 11 zile.

I used ProNails - Extreme White as a white base for my manicure. On my index finger, I applied Catrice -It blue my mind using a sponge. Trind.

Am folosit ProNails - Extreme White ca baza alba pentru manichiura mea. Pe aratator, am aplicat Catrice -It blue my mind, folosind un burete. Lacul de unghii ProNails il puteti gasi online, pe  Produsecosmetice.ro.
Free counters!