Showing posts with label El Corazon. Show all posts

Wednesday, 17 January 2018

Sweet pink nail art

Hi,
As we didn't have much snow this winter, I decided to bring some on my nails. It's still cold and January so I think this manicure is suitable for the moment. I'm definitely a winter person and I love everything about it - even the cold weather - so I think I could wear a snowflake on my nails almost anytime. 
For this manicure, I used El Corazon - Matte Effect 111 (pink) as a base colour. Then I added some ILNP - My Private Rainbow (L+S) for the subtle holographic effect. I stamped the snowflake design on my ring finger from Konad's m59 stamping plate using white stamping nail polish. I added a white pearl in the middle of it to make it even more delicate and elegant. I think that pearls will be a huge part of 2018's nail art trends because why wouldn't they? They already are present on every fashion item and I don't think nails will make an exception. And this can only make me happy because I've loved pearls since forever. I finised my manicure with Seche Vite top coat for some extra shine and protection.
What do you think? I'd love to hear your opinion on this new pearl trend!


Follow me on:

Sunday, 17 September 2017

Ethnic nails

Hi, 
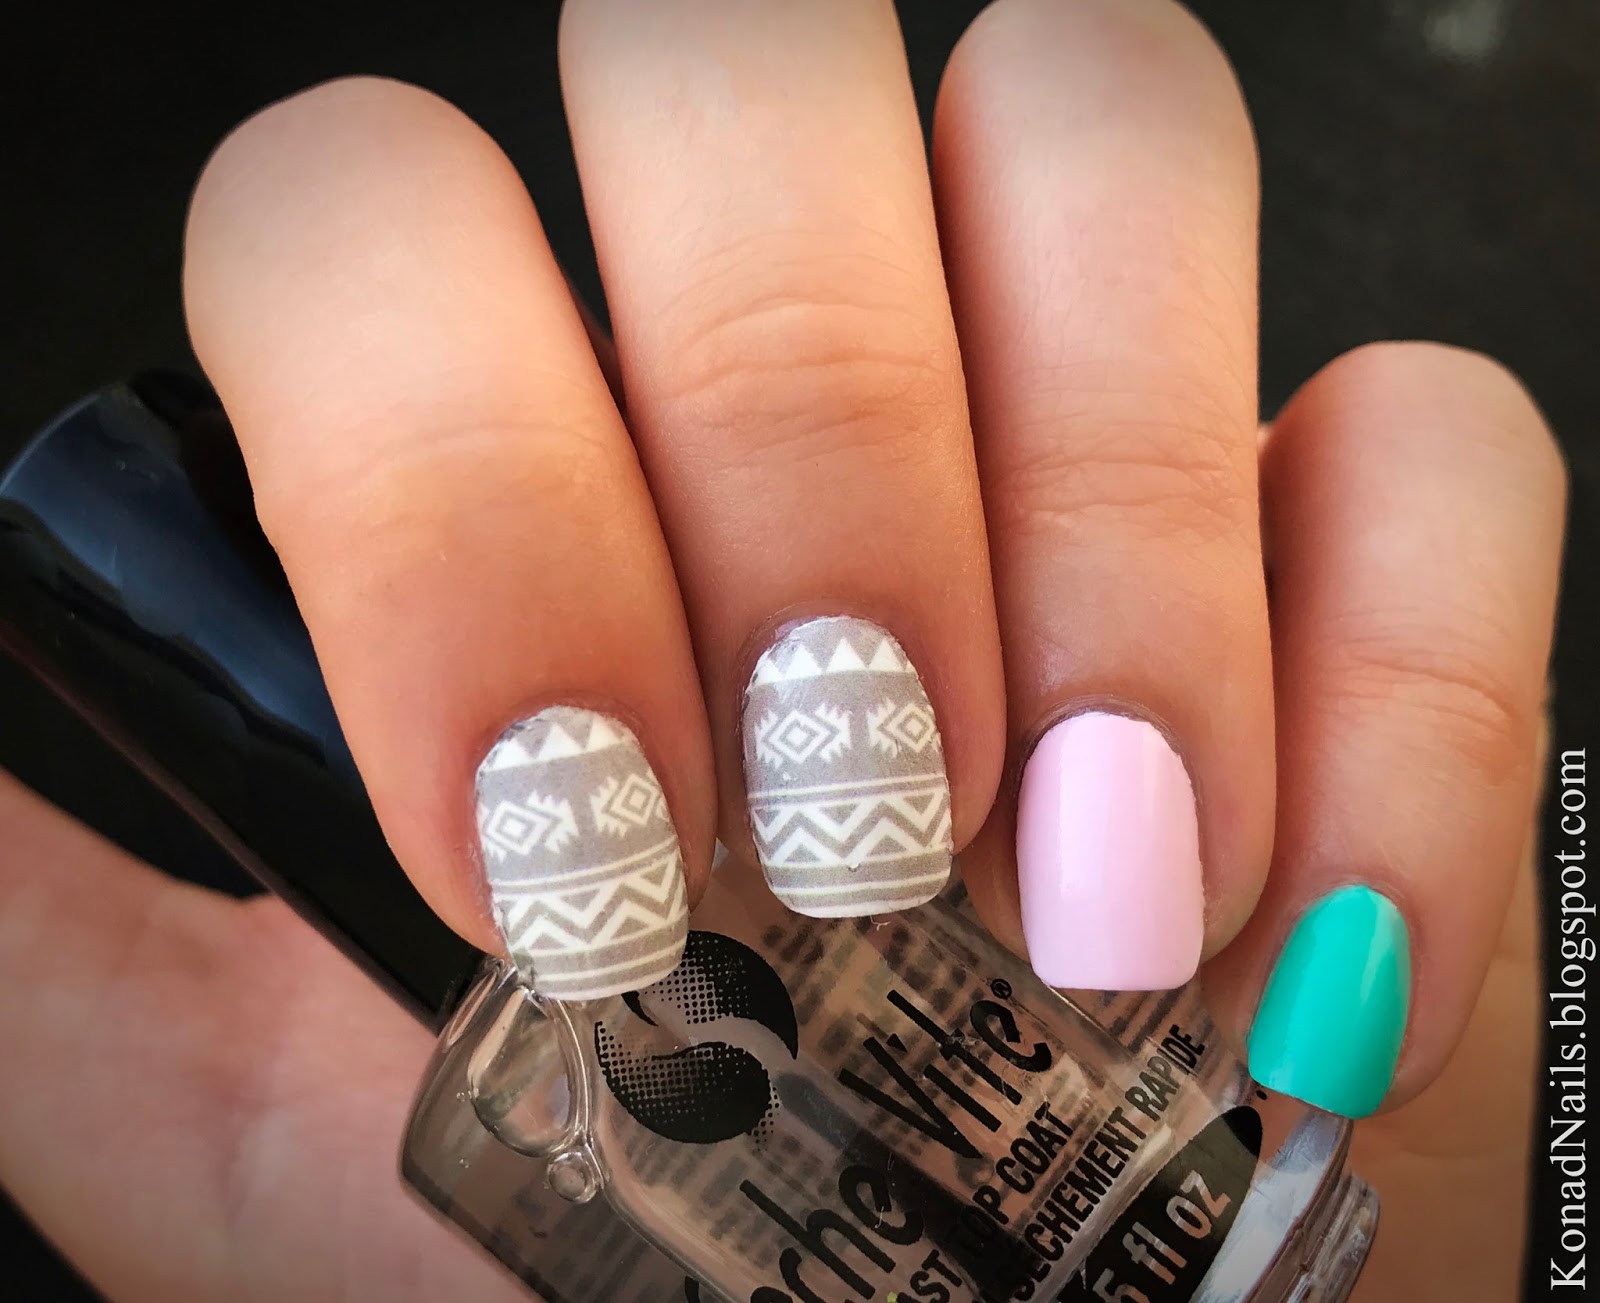
Today I'll show you my new ethnic manicure I easily created using some water decals from Born Pretty store. I started with a coat of white nail polish as a base for the nails where I was going to apply the decals. The nail polished I used on the rest of the nails were El Corazon - Matte Effect 111 (pink) and China Glaze - Too Yacht to Handle (green). If you aren't familiar with water decals, they're really easy to use and they're great for quick manicures. Firstly you have to remove the protection foil from the sheet and then cut smaller pieces containing the designs you're going to use. Next, sink them in a small bowl with water for about 30 seconds. When you take them from the water, you'll notice that de design will easily come off the sheet and you'll be able to stick it on the nail. You'll just have to be very careful as it's really thin and can easily fold by mistake. If you're using them for the first time, just take a little time and pay some extra attention. After a few uses, you'll find them really easy to utilise. I finished my manicure with clear top coat on all nails. What do you think?

Follow me on:

Monday, 4 September 2017

Mix & match manicure

Hi,
Today I'll show you a sweet mix & match manicure that I think is perfect for rainy days like these. I used El Corazon - Matte Effect 111 (pink) on my index fingers and pinkies and Glitter Gal - 3D Holographic nail polish on my thumbs and ring fingers. On my middle fingers I applied Madam Glam - Snow white as a base for the black dots that I created using a dotting tool. I finished with Seche Vite top coat on all nails. What do you think?
Follow me on:

Thursday, 13 July 2017

Yellow roses

Hi,
Today I'll show you my new vibrant manicure that matches the hot season we're in. I wanted something colourful and I went for a combination of orange, green and yellow. I started with two coats of Rimmel - Tangerine Tent and then I created my own decals using Born Pretty's BP-73 stamping plate.

I started by stamping the design with Born Pretty's Black stamping nail polish and then let the image dry on the stamper. I used El Corazon - Matte Effect #145 Neon and Rimmel - Daisy days to fill in the flowers and leaves. After it dried, I applied some clear top coat and then unstuck the decal from the stamper and stuck it on my nail. I finished by applyimg clear top coat on all nails to seal everything in. What do you think? 

Follow me on:

Sunday, 7 August 2016

Palm trees nail art

Hi,
Today I'll show you another summer themed nail art - his time we have sunsets and palm trees! I started with a coat of white as a base for my gradient and then applied Rimmel - Sky high and  El Corazon - Matte Effect 111 using a sponge. The palm tree design I stamped with black is from Konad's m29 image plate. I finished with clear top coat on all nails. What do you think?

Follow me on:

Wednesday, 20 July 2016

Beach nails

Hi,
Today I'll show you another seaside themed nail art. this The nail polishes I used this time were Rimmel - Let's get nude and Sky high and El Corazon - Snow white. I started with nude nail polish on all nails as a base colour and then applied the blue and the white using a sponge to create the sea foam effect. The 3D decorations were from Born Pretty store and you can find them here in a box full of ocean themed decorations for only $3,99. I finished with Oriflame's Matte top coat on all nails. What do you think?


Follow me on:

Tuesday, 22 December 2015

Christmas nails with Madam Glam nail polishes

Hi,
Today I'll show you another Christmas design I created with just a few nail polishes, a painting brush and an eye catchy 3D decoration. I used some gorgeous Madam Glam nail polishes which I'll tell you more about below and El Corazon - Matte Effect  #145 Neon on my index finger. The snowflake decoration is from a Christmas 3D decorations set from Born Pretty store.
 
 
These Madam Glam beauties have just arrived a few days ago, just in perfect time for Christmas. The shades I have here are - from left to right - Such a star, Snow White, Hottie Me and More Diamonds Please. I love all of them but I cannot help but mention that Snow White is the most opaque white nail polish I have ever tried after just one coatSo yes, definitely love it the most! See it for yourself in the pictures below if you don't believe me. No clear top coat.


Follow me on:


Saturday, 19 December 2015

Christmas sweater nail art

Hi,
Christmas is only a few days away, so holiday inspired designs already appeared on my nails for a while now. Unfortunately, I just didn't have the time to photograph and post all the manicures I've been wearing, but here's one which I hope you'll like. I started with two coats of El Corazon - Matte Nail Polish #125 (White) and then I stamped the sweater designs from MoYou London's Festive Collection 04 image plate. The nail polishes used for stamping were Rimmel - Highland and the new blue stamping polish from Born Pretty store. I also used Born Pretty's jelly stamper head which you can find here on their website. I finished with clear top coat on all nails. What do you think?

Don't forget to use my 10% discount code MKAK31 with any order on Born Pretty store.


Follow me on:

Saturday, 14 November 2015

Sunflower nail art

Hi,
Today I'm going to show you a fast and easy mani to do but definitely an eye-catchy one. You will only need black polish, white polish and some sunflower water decals which I got from Born Pretty store. I used El Corazon Matte Nail Polish #125 (White) as a base for the decals and some black nail polish on the other nails to create the contrast. Finally, I applied clear top coat. Easy peasy, isn't it?


Follow me on:


Sunday, 1 November 2015

Pink October nails

Hi,
I know it's already November, but I've been trying to show you some of the pink manicures I wore in October for a while now. During my absence on the blog, I raised awareness for the Breast Cancer AwarenessMovement through my pink manicures; still I had some technical problems and time management issues and I wasn't able to post. Unfortunately, I don't have pictures with all the manicures I wore, so I'm going to show you my most recent one.
After applying a base coat on all nails, I painted my nails two coats of El Corazon - Matte Effect 111. Using a sponge, I then applied Kaleidoscope - Zabava pink glitter using a sponge. On the accent nail, I applied a pink bow-knot nail art charm and finished with clear top coat. What do you think?

Follow me on:


Saturday, 19 September 2015

Shiny unicorn nails

Hi,
Today I'll show you a new colourful holographic manicure. I started this nail art with a coat of white nail polish and after it dried, I applied a few drops of Rimmel - Tangerine Taint, Trind - Burst My Bubble and El Corazon - Matte Effect #145 Neon on each nail and created the saran wrap base. Then I applied a coat of ILNP - My Private Rainbow, which is a beautiful holographic top coat. On my accent nail, I created a shiny silver unicorn using a stencil from TwinkledT's Animal Variety Vinyls pack. The rhinestones are from Born Pretty store and you can find them here on their website. I finished with clear top coat to seal in everything. What do you think?

Follow me on:

Thursday, 10 September 2015

Neon Moroccan nails

Hi
Today I'll show you another Moroccan manicure, this time a neon one. I started with El Corazon - Matte nail polish #125 (White) on all nails, let it dry, then applied clear top coat. After it had fully dried, I applied the Almaz stencils from TwinkledT and then created a gradient on each nail. Around my nails I used Cuticle Defender to prevent the mess. I finished with clear top coat. 
What do you think? 

Follow me on:

Wednesday, 2 September 2015

Watermelon nails

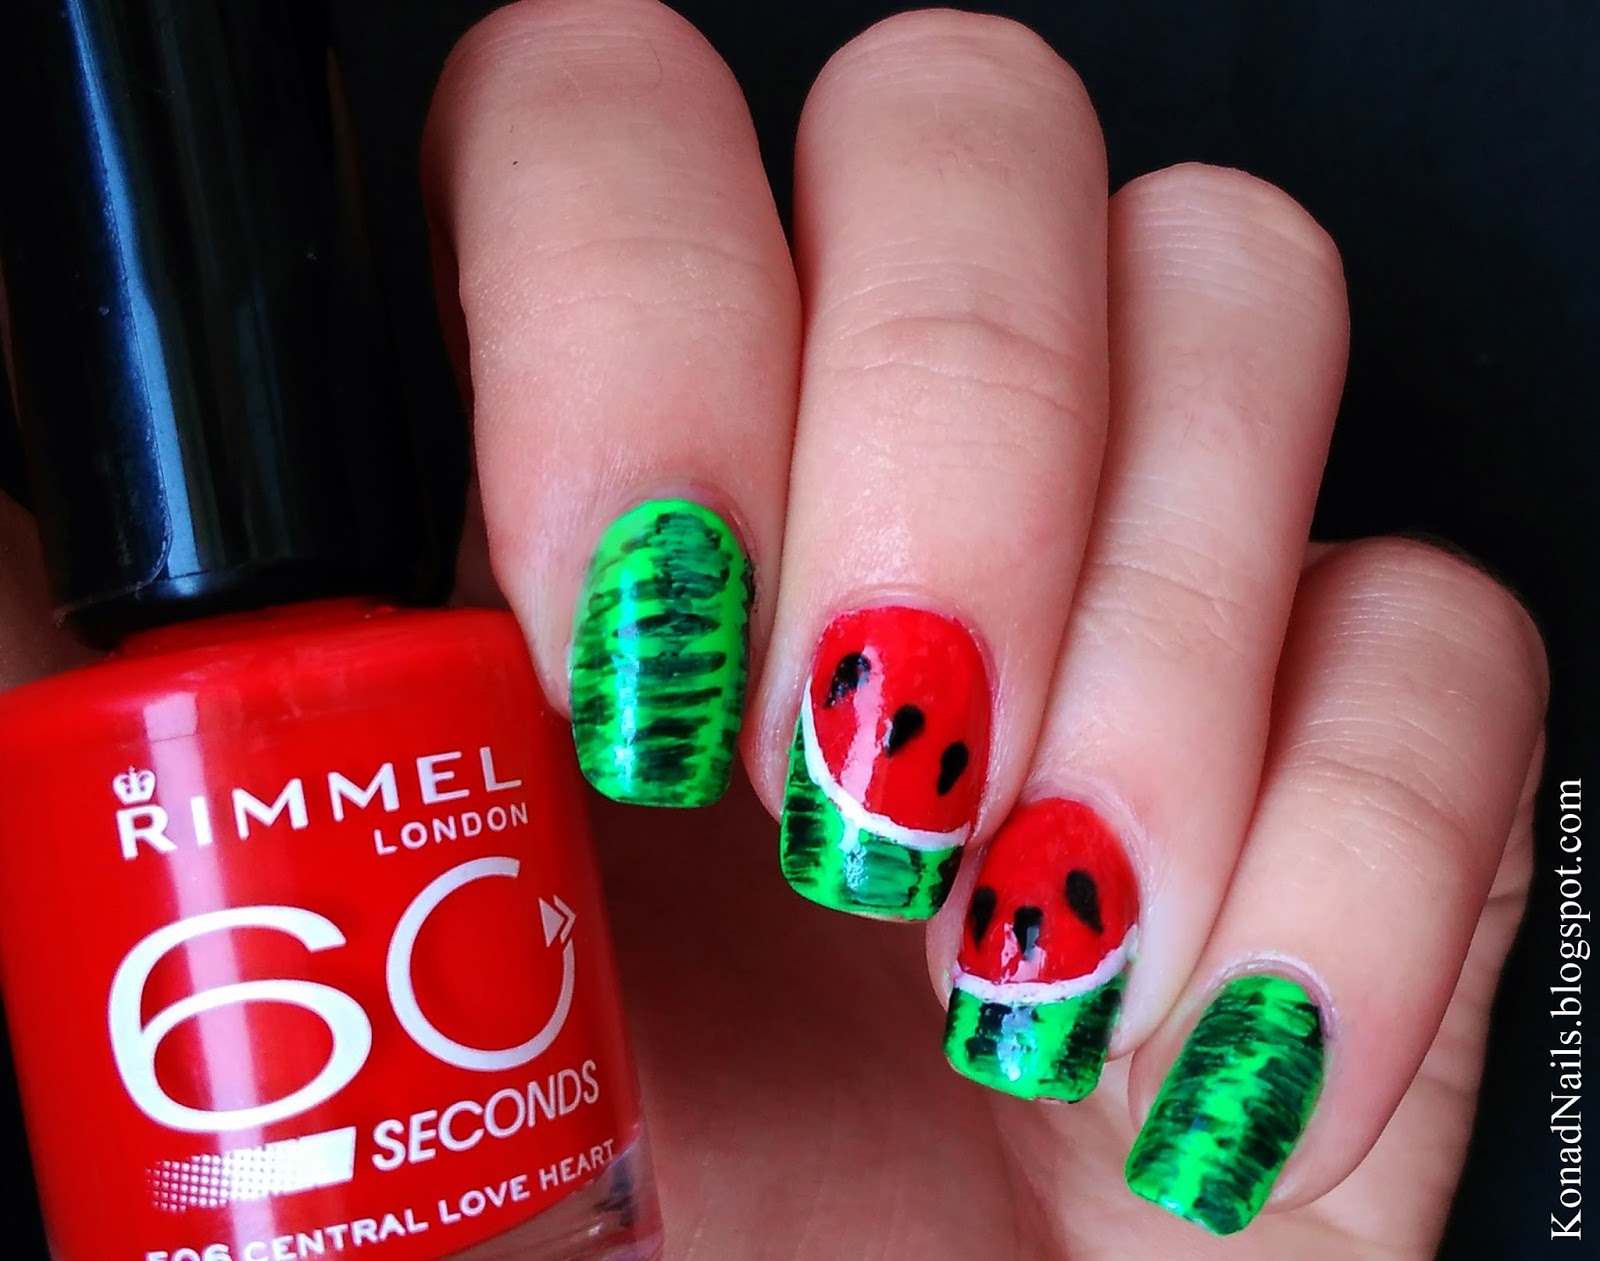
Maybe you've noticed already that I don't want summer to be over yet, so today I'll show you another manicure in theme with the hot season. This time I chose watermelon and these were inspired by @polishthatnail on intagram. The red nail polish I used was Rimmel - Central Love Heart and the green polishes were El Corazon - Matte Effect  #145 Neon and Avon - Green with envy (the darker shade). With a thin brush, I created all the details and finished with clear top coat. What do you think?


Follow me on:

Saturday, 22 August 2015

Summer animal print nails

Hi,
Today I'll show you an animal print nail art which I think is perfect for the hot, summer days. I started with two coats of El Corazon - Matte Effect #125 (white) on all nails and let it dry. On the first two nails, I stamped the zebra and leopard print design from Konad's m78 image plate and filled in the design using yellow and orange. On the last two nails, I created a simple gradient using China Glaze - Sun of A Peach and Rimmel - Daisy Days. Obviously, I applied Kaleidoscope Cuticle Defender around my nails before doing the gradient, so as to prevent the mess and save myself a lot of time which I would had spent cleaning everything up. I finished with clear top coat. 
What do you think?

This is how my nail art sponge looked like for this gradient. You can get a set of 3 sponges from LadyQueen.com, for only $1.29 - find it here on their website. You can also benefit from a 
15% discount with any order on their website by using LTLC15 coupon code at checkout. Moreover, this website offers free international shipping. So what are you waiting for? Go order now!

Follow me on:

Thursday, 20 August 2015

Limes

Hi,
Today I'll show you another fruity nail art I easily created using MoYou Lodon's Tropical 08 stamping plate. Keep on reading if you'd like to know more about the products I used for this mani.

A few days ago, I received my first nail mail from Moscow. Yes, my order from El Corazon shop arrived safely to destination. Below you can see the products I got and I have to say that I used all of them for this manicure.

I applied the neon polish on all nails, except from my ring finger, where I applied two coats of matte white. Then I stamped the design using the Special White for stamping and the neon polish on the accent nail. 
I finally got my first Cuticle Defender and I have to mention that it's a great product, that saves a lot of time and effort. You just apply a little product around your nails, it dries and then you can do anything you want - stamping, gradients and so on - and finally you remove it and everything's clean! At the end, I applied the Top coat like gel. What do you think?


Follow me on:

Free counters!